Showing posts with label Images. Show all posts

Tuesday, 19 May 2015

How to Cut Doors in Model T

I've been busy working away on the T, the details will follow shortly. What's more important is that I found this scan of an old issue of Hot Rod Magazine detailing how to add an opening door to a fibreglass body. With the work I'm undertaking at the moment, I have realised the great need for a door, climbing in and out of the car is very difficult for me, and it's not going to be getting any easier until I cut a door in the bucket.

Hot Rod Magazine Dec. 1966

Monday, 13 April 2015

Pump Conclusion and Weekend Cruising

I found the seat riser I'd made a little too high for my liking, I felt like I was sitting on the car instead of in it, I didn't feel safe at all, I liked the angle for my leg position, but hated it for the excess pain it gave me in my back, so Friday's job entailed altering the angle and dropping the height, it didn't take long at all, but, it has made a huge difference to the over all comfort.
After my last post I went out for the weekend cruising down to some buddies' workshop to hang out for the day and then off to a show the next. When I was running down to the shop the T did puke  a bit of coolant again, I can only assume it was levelling/burping as this did not happen the next day nor has it occurred since.

Frinton Flyer / Gonzo Customs' awesome pedal and electric cycles

I picked up Rob of Gonzo Kustom fame, and cruised on over to a guy who was going to repair the intake he said he'd be able to tig weld it for me. I was going to attempt the repair myself, but decided against it in case I made a mess of the job and it ended up being more expensive to have someone undo my work and repair it properly. Then we blasted some back roads down to hang with Marc and Rob at the Frinton Flyer shop, much fun, laughs and innuendos were had by all. These guys build some insane pedal and electric bikes, the likes of which most of you would never have seen before, they are truly stunning, should you be in the market for anything custom and bicycle these dudes are some of the best in the business. I also had the pleasure of meeting Danny of Maddanny Pinstriping, who was laying down some stripes on one of their new builds, he's an all round great guy and one hell of an artist, I'm certain I'll be enlisting his services once I have an idea of what's going on with the paint on the T. At end of play, we headed back to collect the manifold, which was repaired astonishingly well at an even better price, dropped Rob back of at his place stole a coffee, bought one of his kick ass trucker hats and blasted home.

Gonzo Bars Trucker Hats

My freshly repaired intake, a huge result with a tiny investment.

Sunday was another pretty early start, I had invited an old friend to come out to a car show with me, Spring Break 2015, so headed off to pick her up and cruise to the show. Sadly the drive was laborious, aside from the company of course, there were road works and average speed cameras almost the whole way there, luckily the weather was stunning with the sun beaming all day long. We arrived at the site, after a little searching figured out where we were supposed to be going.
I thought that the entry price was fairly reasonable at £7 per head, paid up and we were ushered in to the show arena, I'm not sure why, I can only guess it was in order to not offend me or something, the T is far from a show car, and even further from show quality, but I did as I was asked. We parked up and went for a hobble around checking out the cars, then headed for the stalls, of which there were about 6, I can't say I was overly impressed seeing as the trade stands were free of charge, I needed to have a seat, so grabbed what turned out to be one of the worst cups of coffee I have ever drunk in my life, had another look around and decided that there was little reason to stay, and headed home.
Although it is very early in the season, the show was pretty non event, sure by the time it came to leaving there were quite a lot of cars to see, but that was about it, next to no stalls, dreadful coffee and time to leave, it's pretty local so I'll probably go again, but I'll be hoping that it grows a fair amount next year.
But hell; the sun was shining, had some great company, saw some cool cars and got to go munch some miles in the T, I've got a new comfy seat base, no more worries of over heating, even got the obligatory hot rod sun burn, its not all bad... Now, where's that aloe vera gel?

My T at Spring Break 2015 courtesy of the lovely Heather

Friday, 10 April 2015

Water Pump Continued

While I was waiting for the pump to finally show up, I decided to fit my new headlamps, the old ones were incredibly cloudy and caused the "light" to be very poor

Before and after

I flushed out the cooling system a few times until everything ran clear, it took a fair while but that was to be expected having sat for 4 years with no antifreeze in it, I de-scaled the thermostat housing, made a new gasket and fitted a thermostat after I'd drilled the bleed hole in it.
Eventually the water pump arrived, as you'd expect it took mere moments to fit, popped the rad hoses back on, filled with coolant, burped the rad etc, I had a little time left so I managed to tweak the carb a bit and sort out the Idle speed/mixture. 
On the way to a local hot rod meet it puked coolant, self levelling I can only assume, but it appeared to be running a lot hotter than it had before I did the work. A little way further down the road it was high up on the gauge so I pulled over to let it cool, I did notice that wherever I placed my hands it wasn't really that hot. I refilled the rad with the coolant that had gotten spat out earlier just in case it wasn't levelling and it was an air lock, but soon after I set of it puked again. I just carried on up the road to the meet.
I had a nice conversation with one of the guys there about the troublesome journey and was beckoned to sit down with my friends have a nice coffee, burger and fries, followed by a coke to wash it down. We stepped outside and more conversations ensue about how none of it really made any sense other than the mild restriction of the newly fitted stat could be hindering the cooling and the little rad couldn't keep up. I set off and got home just fine, it was still showing a bit warmer than I'd have liked, but didn't smell bad and was running well, so I continued home. Once back at base I grabbed my laser thermometer and found the highest reading was just 85 Celsius, not too hot at all, I can only assume that the gauge is lying, that the sender and gauge aren't matched and the car has been running very cold since I've had it. 
This morning I decided to take a look at the remaining cooling components, first I found that the fan was attempting to work against the air flow, so would have been doing nothing but slowing the incoming air, so I reversed the polarity of the fan and made if flow the right way. One of the chaps at the meet suggested that I move the license plate to beneath the grille as opposed to behind it, which made perfect sense an couldn't hurt, so that has been done too.
With any luck this should be the end of the cooling issues, but we'll see there was a considerable amount of emulsification found under the oil cap when I changed the oil yesterday, this could be from it standing for so long, or could well be a lot more sinister. I can only hope that it's due to standing, otherwise it'll be time to source a new, bigger 4.6 litre engine.

Sunday, 5 April 2015

The Drag Header Deal

A little while back I managed to source myself some kick ass, used, open drag headers. Ever since the delivery dude showed up with them I've been longing to get them fitted, as usual pain, time constraints, priorities and sensibility got in the way and I still haven't got round to fitting them.


A few days ago I was hoping to manage a couple of hundred mile journey to Wheels Day, a "season starter" type event where many rodders shake down their new builds for the first time, and even more blow the cobwebs off of their cars, dip the oil and cruise on down.
It dawned on me that, should I make such a journey with open headers, I'd be near deaf by the time I got to the first gas stop, the joyous charm of headaches and the chime of tinnitus would be with me for hours. After a little consideration I left the headers in their box. It turns out that I never went to the show but the headers remain boxed regardless.
Back when I was riding motorcycles 24/7 I had a number of bikes with straight through exhausts, but due to UK law I always wore a helmet, which certainly muffled the rumble of open pipes. While I was reminiscing I recalled a type of baffle that I'd fitted to a number of customers bikes, that helped keep their neighbours a little happier.


I scoured the internet for some of these baffles and I managed to find a store in Germany that stocks the little beauties, they haven't changed a bit since I used them last. At two inches in diameter and four in length, they should help me to have the look I want without the headaches, tinnitus and police attention. All you have to do to fit them is drill a hole for the retaining bolt, de-burr it, slide them in and fit the retaining bolt, this also lends them to being removed pretty quickly for any RWBY, run what you brung, events that I may attend in the future.
I'm still waiting for them to be delivered, but seeing as it's Easter it could take some time. Once they're here, and fitted, those headers will be going straight on, and with any luck should sound just as good as they look.


Wednesday, 1 April 2015

Swap Meet Intake

Sure the title is a little misleading, but I couldn't find a way to say the carb, intake, seat box, saw, welder instalment, enjoy.

In the last post I told you about how Soph and I went to the NSRA Southern Swap where I picked up an Offy intake and the 390 Holley for the T Rod. I have come to realise why it was quite so cheap.
I set about rebuilding the carb and luckily only found one missing part, the accelerator pump needle valve, which by all accounts is very common. That's not a big deal, they're about 91p or so. The carb had clearly been apart and not worked for quite some time, the floats were completely out of whack and would have flooded instantly and there were tons of gaskets and seals missing etc.


If you ever have to rebuild a carb, something I like to do is to use four bolts and 8 nuts to make a simple and stable carb stand to make working on it a lot easier, you don't have any interference with the throttle mechanism and can open up the butterflies and not damage anything, I think I used M8 x 100mm bolts but could be wrong, you can see how it works in the pic above


The bigger issue came when I started to clean up the intake. I soaked it in degreaser and let it sit for a while thinking it would be better to get the chunks of gunk and dirt off of it before blasting, as I scrubbed away and started to clean up the mating surfaces it became apparent that what I had purchased was more of a paper weight than a performance part.


Please excuse the quality of the photos, I only had my laptop webcam to hand in the shed. I'm going to attempt to repair the crack with HTS-2000, a low temperature aluminium repair rod, not dissimilar to brazing for aluminium.  If, for whatever reason, it doesn't work then I'll have to pay a visit to an engineer friend and see if he can TIG weld it for me.

I've been pretty busy this last couple of weeks. I've also made up a new seat box. New probably isn't the operative word, what I have replaced was actually a very basic 2 x 1" wooden frame that served very little purpose. What I replaced it with on the other hand is a series of 11 mm OSB triangles 4" at the front tapering to nothing at the back, this should help alleviate the knee and lower back pain I was experiencing when driving the T Rod.


As with everything I started by measuring the width at the front edge for the seat to determine the width of the front of the riser, which is the part resting on the bench. I then cut out the triangles where the top length will be the depth of the seat, the height is the 4" that I want front to be raised by and the remaining dimension, the base, was pre determined by the other two measurements and the angle of the front board. To assemble the cut boards I used parts of the cut up old frame, glued pre-drilled and screwed together and left it to dry with a brace keeping the back end in the right place, that's the nasty bit of wood at the top of the picture with some right angle brackets on each end.


I left the basic frame to dry over night, it was getting late and I was getting very sore, so I decided to call it a day. The next evening I got back out into the shed and made the top, again from 11 mm OSB, a glued and screwed construction boxing all of the joints and adding a lot of rigidity to the seat box. What you cannot see is the additional 2 x 1" bracing I have cut to fit with matching angles at the upper front of the box and along the sides to add more rigidity and a sufficient enough structure for me to attach mounting brackets. I cut out the bases of the driver and passenger seats in case this works out as well as I hope. This will enable me to attach seat webbing to the base in the future so I have the option of re-upholstering the seats and replacing the current foams etc.


For a bit of added protection, and to disguise the little bit that pokes up above the carpet, I painted everything in a black metal paint, a no name Hammerite alternative, which is also suitable for use on wood, I simply applied a very thin base coat and an average top coat to ensure I had good adhesion to the board.

At the beginning of the seat box construction, after just a few cuts with my circular saw, I had a bit of a strop. I've been in need of a decent, by DIY standards at least, table saw for quite some time and decided to throw down my tools, check the net, place my reservation and head out to the tool store and pick up a saw that I have been lusting over for a good few months, the Evolution Fury5, with the added bonus of a £20 discount.


The Evolution Fury5 is a 255 mm table saw that not only cut wood but also up to 3 mm steel. The only real issue was that straight out of the box the saw was set up very badly, with over 7 mm of run out in the blade angle, it took me quite some time to square the blade, I ended up having to remove the grille on the bottom of the saw and undo 4 allen bolts that mount the saw, align the blade and attempt to keep it there whilst tightening the bolts. I had to leave one of the bolts out as when tightened, even slightly, it would move the blade out of line. Eventually I managed to get it all lined up right and it now cuts a two foot length of board with no run out at all. It is a shame that it wasn't this good straight away, but I'm happy that it works so well and made making the seat box a pleasure, and a damn sight easier than using my circular saw.

As we were heading to the tool store Soph and I were chatting about whether I should buy my new welder while we're there or leave it until it was needed, I came to the conclusion that it would be better to leave it for another day, not wanting to tie up cash in something I don't need just yet. I had decided that I'd just walk in, go to the counter and collect the saw that I'd reserved, not look around, just get in, get out and get back home to assemble it and get the seat box finished.

As I went through the door I had that "kid in a candy store" type feeling and went against my decision and had a look around, attempting to convince myself that I don't need loads of shiny new tools, I turned to Soph and said, "Nearly done, we just gotta go check out the cheap bit, always worth a look." The store has a section, at the back, set aside for returns, refurbs, ex-demo, ex-display tools, boxes etc. I'm glad I changed my mind. Sitting in the corner, on the bottom shelf, was a little Clarke 151EN Gas/Gas-less welder with a huge £80 discount, it'd been used in a demonstration at a trade show, or an in-store demo and was in excellent condition, having been fully tested just 12 days prior. I was devastated, I had only bought enough cash to purchase the table saw. As I was grizzling that I'd left my cash card back at home, Soph piped up that she had her purse in the car and was happy to loan me the cash to buy the little welder. Needles to say, I walked away a happy man. With welder and table saw in hand, well... carried by Soph and on a sack barrow by one of the guys that worked at the store, they loaded up the car and away we went.

I'm still finding it all a little too coincidental, how I had my sights set on just getting the saw and getting home, not buying a welder, waiting until later etc. Then going against everything I'd said and finding exactly what I wanted, at a much lower price, with no more money in my pocket, to be rescued by a friend with a money card, and come away with my new welder. I guess life's just like that some times, and that day, I won and in the end that's all that matters.

Wednesday, 18 March 2015

A long time coming

It's been a fair while since I've written anything here, I have been spending far too much time searching for parts and sorting the sheds and getting side tracked with general house/garden maintenance, which I'm sure no one wants to hear about.

So lets get on with some updates... this might take a while...

I dragged my trailer up to Boston in Lincolnshire to go and collect my front axle and leaf springs. There have been times where I can be pretty patient, but, having waited since before Christmas for the axle to get bought down to my place, I decided to go get it myself. It turns out that with the best intentions, my cousin just didn't have the time to bring it down here, but he didn't want to let me down, he's a good guy like that. I thought it best to ease the burden and drove up there to pick it up myself. The journey, as usual, was pretty uneventful, which I guess is a good thing all in all. We had some minor trailer light issues before leaving, that reared their ugly head during the trip, but with no tools to rectify the issue, I just stuck on my high level fogs and kept on trucking. The following day a couple of friends popped over and pulled it out of the trailer and stuck it away in the big shed out of the way for now.

I finally managed to find my thread cutting sets and determined the thread of the wheel studs on my back axle to order up some new wheel nuts to get the Rocket Racing Strikes fitted, it turns out that they are 7/16" UNF thread which is used on many UK Fords so the choice was plentiful and I managed to bag a set of 10 for just £15.50 to my door


I had a friend, Soph, accompany me to a local swap meet, over here in the UK its one of a few hot rod specific swap meets, most of the others consisting of old UK built car and motorcycle parts, with the obligatory, awful market stall, snap in one use type tool stands.
I hadn't attended the NSRA Southern Swap meet for around eight years and man has it got big, I'm sure there were twice as many people as my last visit and a lot more stalls, yet after talking with some local rodders I'm told it was quieter than last year, I can't possibly imagine how busy it must have been. I was a little upset that I wasn't intending on running a blown small bock Chevy because there were thousands of SBC parts all over the place, but sadly that's just not going to keep me in budget.
Luckily I did manage to come across a rather reasonably priced Offy inlet manifold and a little 390 Holley carb for my Rover lump, picking it up as a package deal for just £175. Granted I'll have to shot blast the manifold and rebuild the carb, but seeing as Holley Trick Kits are only around £40 and I have some media for blasting aluminium I think that was a bargain.


Soph has also assisted me in removing the rad shroud and that awful brass winged fake temperature gauge thing that sat on top of it, along with fitting my new wheels... that have been sitting around in the tool shed since the tire dude came round and fit and balanced the tires for me.
While we were having a bit of a tidy up I came across a handle bar mirror from the very first motorcycle I built back when I was just seventeen, eighteen, I couldn't help but replace the useless botched up 3" peep mirror that was fitted on the T. With a quick re-thread (from the newly found tap and die sets) and enlarging the hole in the mirror bracket, I have a good use-able mirror. What's more it's one that I don't have to angle by hand every time I want to see what's behind me, and the added bonus of a little bit of personal history for good measure. Sure that may be a little sad to some but that's the reason that I keep all my old junk laying around, the bike I built is long gone, as I sold it to a friend who promptly blew the motor beyond economical repair. But, I still have a little piece of it to remember and keep with me now, and I like that.

I ordered a few mundane things, a new vernier calliper, some welding magnets, new chuck key for my pillar drill etc. but nothing too interesting.

I found a cool little steering box/column to use with the F100 axle. I'm keeping the car right hand drive, it's a UK built car using mainly UK spec parts so I figure it's the right thing to do. The box/column is from an old 30's Austin 7, I choose it mainly because it's tiny, and it was cheap, should I choose to build it in a cowl steering type set-up it will take up very little room, and if I go for a regular side steer design it's size will be a great help seeing as there isn't much room down near the starter motor. I can't go into great detail, it was advertised as being in good use-able condition, but I haven't even got round to opening the box to find out for myself, but parts are readily available, and there is a lot of adjustment in these boxes so it shouldn't be an issue anyway.


Finally I found some lever arm shocks on-line, which should be arriving today, they were originally removed from a  Ford Anglia 105e I believe they were manufactured by Girling and fitted to numerous vehicles over the years. They look to be in great condition with no pitting or excess oil all over them, and I'm told they have good resistance so in theory they should be as described by the seller and in a, pretty much, ready to fit condition, they even come with the drop links, which is a bonus. If all goes well they should just need a light clean and maybe a splash of paint and will be ready to be incorporated in the design.

That little lot should bring you up to speed, I apologise for the lack of updates Soph and I have been very busy sorting out my mountain of tools, scrap metal, parts and trash trying to get me straight again for when the time comes to start really getting into the build.
Next stop wheels for the F100 axle and some sheet steel to collect from a local rodder...

Tuesday, 16 December 2014

Wheels Wheels and More Wheels

Since my first drive of the T I knew it needs more meat in the back even with the little 3.5 litre Rover motor it doesn't hook up very well, and that's just on the street and without going full throttle. The rear tyres are skinny, hard, old and not very tall so not the best examples to start with and are pretty much everything you don't want from a tyre on your hot rod.
Sadly who ever built the car originally used a narrowed Volvo axle in the rear, but really its a bit too narrow, there are already witness marks on the pick up bed from the current 4" wheels. They have around 3 1/2 - 4" of backspace which is a fair amount on a 4" narrow rim, whatever wheel and tire combination I settle on, there must be a maximum of  3" of wheel/tyre hanging off the back. Seeing as I am looking for 8+ inch in width its near impossible to find a wheel off the shelf with such a huge amount of negative offset.
Its looking like my only option is to make some custom wheels, which will probably end up at around 7" to negate the overly narrowed axle and tyre rubbing but should still significantly improve traction.

I realise that wheel terminology can be confusing at best this image clearly shows all of the jargon you need to understand to select the wheels for your rod.


You will see offset stated as ET on most factory and after market wheels. The positive and negative ET are measured in mm. ET may seem a strange way to abbreviate offset, but it is actually an abbreviation of the German word, "Einpresstiefe" the literal modern day translation being offset, why a German abbreviation is used on wheels I do not know, though purely out of interest I may do some research and find out the reasoning behind this standardisation.
Similarly you will often see wheel width measured with the suffix J. J is not used to identify the measurement of width, it is informing you of the wheel cross section, the shape of the bead seat and is a global standardisation for tyres and rims to ensure that all tyres and rims of the correct sizing are both safe and compatible.

Should I come across any further information regarding wheels and this associated jargon, I'll add it to this post.

Sunday, 14 December 2014

Love at First Sight - Street Altered Style T Bucket

Following such a strenuous day I have been napping and reclining in my comfy chair glued to my lap top and  consequentially fell in love all over again with this;


Incredibly angry altered street styled Model T bucket with a great stance, even though its probably not actually drivable at its current ride height with the front of the chassis sitting about 2" off the floor. This one has really got me thinking.

Wednesday, 10 December 2014

1/4 Elliptical Front Suspension

After around 18 hours of research, looking at pictures, reading every tech article and forum entry I could find, I have found an ideal design for the quarter elliptical suspension that I will be using on my T.


Photos and craftsmanship courtesy of Kardude67 from the infamous H.A.M.B. Jalopy Journal forums

There we have it!! An absolutely stunning piece of engineering and design, it should even work just as good as it looks. From what I can see the builder has scratch built the upper links and the awesome spring/link mount located on the original U bolt holes on the old parallel leaf spring pads, not to mention those speed holed frame rails and lovely curvy cross member. It look as though there is a height adjustment bolt fitted through the top of the rail a la Posies 1/4 spring kit, there is also a horizontal bolt, that could well be through a spring eye, or possibly a through some machined solid stock with the bolt acting as a locator. However he has chose to do it, it doesn't change the fact that it is an incredibly aesthetically pleasing set up, and a true credit to his work

1960 Ford F100 Front Axle

I was chilling out last night, cruising around on the net, ropey reality TV car shows in the back ground, a pretty standard evening for me. As always I was searching the usual sites classifieds for cheap parts, inspiration, boobs etc.
I came across a chap, not literally of course, that had just finished a Jag IFS conversion on his '60 F100 and had a post up on a Facespace page offering the remaining parts, "if anyone can make use of them"

"Sorry for the bad pic. I have a 1960 Ford f100 front axle
and a few oddments available if anyone can make use
 of them. Message me if interested thanks"


After messaging a couple of buddies and chewing fat about possibilities, design concepts, and suspension options I started the usual lengthy process of "instant" messaging to procure said parts. I decided to make an offer on the entire font axle assembly and the rear leaf springs to allow me to assemble and adjust a suitable set of leafs suited to the T.
During the course of the evening/early morning I have set my sights on building the solid axle with a 1/4 elliptical leaf spring, the shock and attachment details are yet to be decided upon, but are in the mix.

Monday, 8 December 2014

Shiny T

Found this highly polished rod whilst cruising around the net last night, a little too shiny for me, I'd be scared of driving it in that condition, but the use of numerous metal finishing techniques, traditional colour and complimenting interior do get the cogs turning.


My Model T RPU

After a 200 mile trip, with a few stops, cold toes fingers and nose and a stupid grin on my face, my new T RPU is home!  Here's a few pics with the hood/tent up, not the best contraption and incredibly noisy with it slapping around all over the place, but should it have rained, I'd have been dry, so I'm not going to complain too much.


Pull in at Inspiration Station

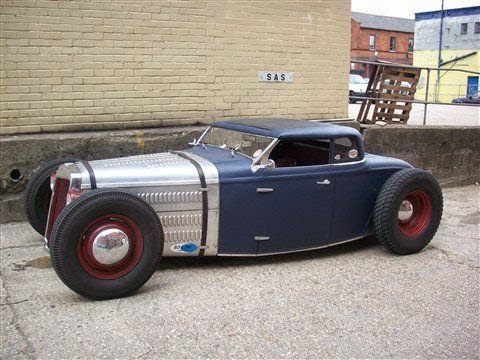
I've been collecting images of various builds for inspiration as to how I should go about finishing my car